
Synology and Certificates with a Windows Certificate Authority (CA).
Synology storage devices can be convenient and cheap devices to get started in the space. Like most things it has it’s quirks and something I’ve found is the certification process can be convoluted. I’ll walk you through the issues I’ve found when you are trying to issue a certification for a Synology device to secure the DSM web portal. Don’t want to read all the background information? Skip to the bold.
When DSM is first setup the Rackstation (and other DSM devices) issues itself a self-signed certificate. When connecting to DSM that is using a self-signed cert you’ll be given a warning in the browser.
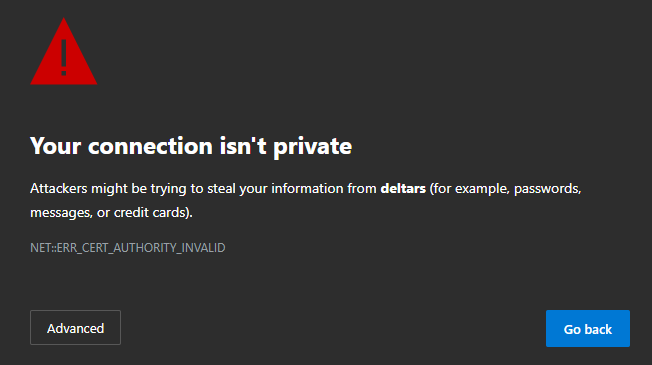
The first issue is that because it’s a self signed certificate your computer won’t trust it. Windows and other modern computers come with a list of trusted authorities or organizations that issue certifications which are used to prove identity. For the purposes of this I’ll assume you have a Windows Server CA/domain and that your computer has said CA added to it’s list/repository of trusted CAs. This will allow you to issue certificates of your own that devices on the local network/domain will trust.
Generally this is the process for obtaining a certification (regardless of CA or specific process):
- Generate a certificate request.
- Get the request signed/have a certificate issued.
- Install the certification.
Synology DSM has a built in tool for creating cert requests located here: Control Panel -> Security -> Certificates -> Settings -> Advanced -> CSR. This was where I started, naturally. You are given the options to specify several subject attributes but that’s about it. Unfortunately, I haven’t found a way to specify a Subject Alternative Name (nor DNS names) through the DSM UI. See this:
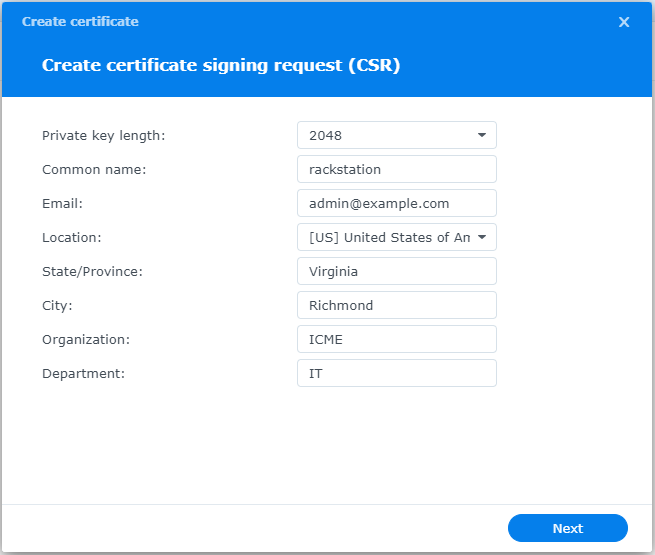
After clicking Next and then Download you are given two files: server.csr & server.key. The CSR file is the actual request file with the information about the request and the key file is the private key which will be used to sign connections (see: public-key cryptography) once a signed certificate is in use.
From here there are two issues we’ll run into when using a Windows CA for use in a LAN.
- The CSR generated by DSM doesn’t have any Subject Alternative Names.
- Windows CA (using the MMC snap in) doesn’t allow you to specify a certificate template through the GUI.
Keep in mind #2 isn’t a DSM problem, just something I ran into. #1 however will cause browsers to throw a fit. From here I’ll walk you through the process start to finish.
Issuing a certificate for DSM for use on a local LAN with a Windows CA.
- Create a proper CSR.
- Use https://certificatetools.com/
- Fill out the certificate generator with the required information. Remember to click “Add” to add the entries for Common Names & SANs or else it won’t actually be added to the form.
- Download both the key and CSR from that site.
- Issue the certification using the CSR.
- Copy the CSR to your Windows CA.
- Open an administrative powershell window. Navigate to the folder with the cert.csr file.
- Run: “certreq -submit -attrib “CertificateTemplate:WebServer” cert.csr”
- You will be prompted to select which CA you wish to use to issue the certificate. Select the appropriate option.
- Save the resulting .cer file.
- Install the certification and key on the Synology DSM.
- In DSM, navigate to the certificate section: Control Panel -> Security -> Certificates.
- Add the certificate. Use the “Add” button and follow the on screen prompts. When asked provide the .key and .cer file. Under the description I typically put which CA is the issuing CA for future reference.
- Set DSM to use the new cert under Settings -> Configure. Use the drop downs to select which certification each service should use.
Notes
If you attempt to use the Certificate Authority MMC GUI to issue a certificate with a CSR that doesn’t specify the exact template to use you may be given a “Denied by Policy Module 0x80094801, The request does not contain a certificate template extension or the CertificateTemplate request attribute.” You’ll either need to setup the certsrv website on the CA or use the CLI option I provided above.
I recommend setting DSM to auto redirect clients from port 5000 (http) to port 5001 (https).
You can view the issued certificate using the MMC snap in, as well as revoke it if needed.